Introduction
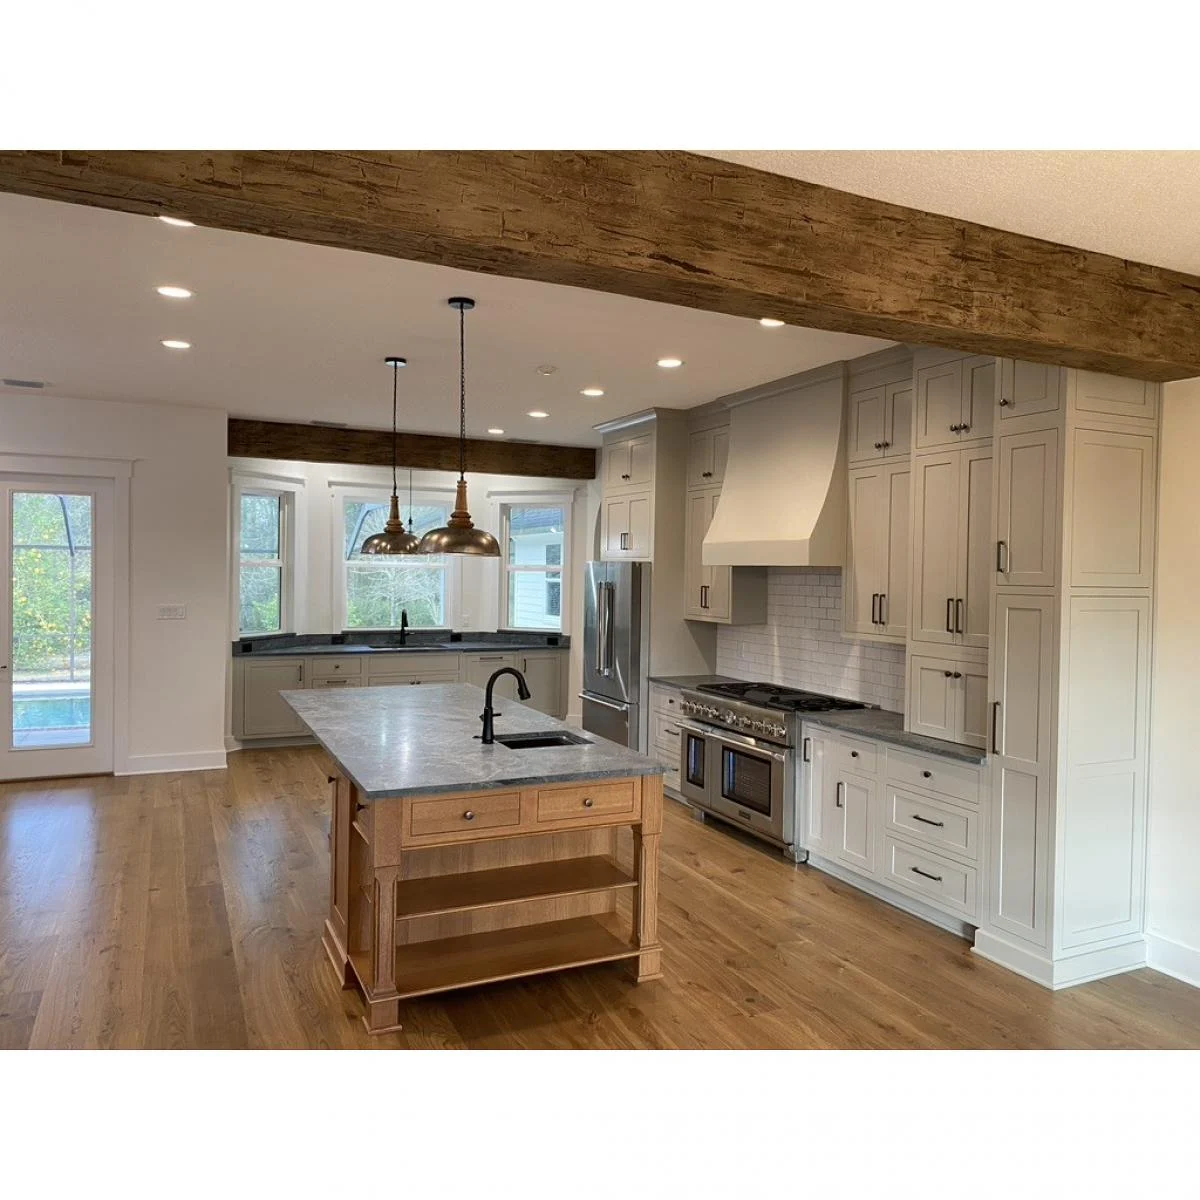
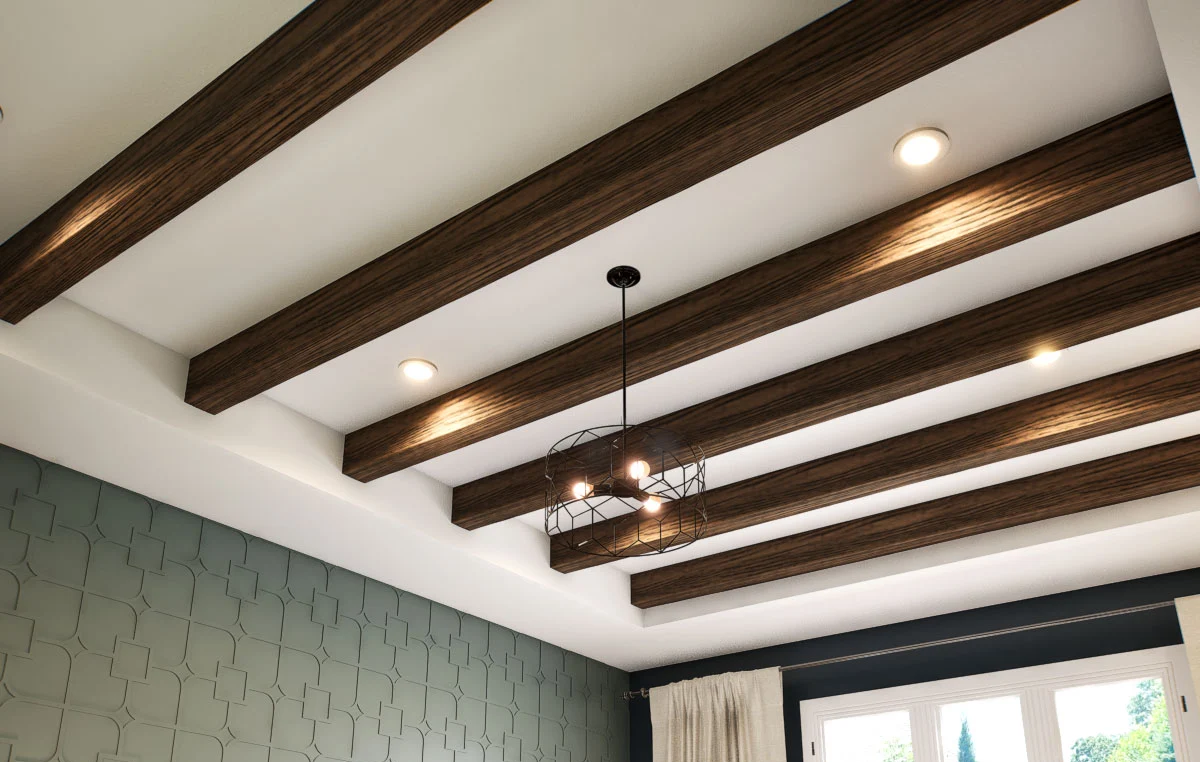
Transforming your space with faux wood beams can add a touch of rustic elegance and architectural interest. Whether you’re a suburban homeowner looking to enhance your living space with ceiling beams, an architect seeking design inspiration, or a contractor ready to offer clients something special, this guide will walk you through the process. Embrace the DIY spirit or consider professional help for a flawless finish.
Step 1: Planning and Preparation
Deciding between a DIY project and hiring a professional is crucial. While DIY can save costs and offer a rewarding experience, professional installation ensures precision and quality. Consider your skill level and the complexity of your project before making a choice.
Step 2: Get the Right Tools
Gathering the right tools is essential for a smooth installation. For this project you will need:
- Faux Wood Beams
- 2 × 4 (For Blocking)
- Construction Adhesive
- Power Drill
- Saw
- Chalk Line
- Finishing Nails
- Screws
- Caulk or Wood Filler
- Stud Finder
- Tape Measure
- Ladder
Step 2: Measuring and Marking
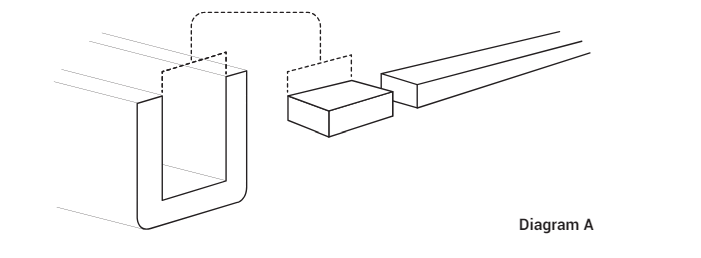
Determine where the beams will be installed. If installing multiple beams take the time to determine the spacing of the beams. This will help you determine how many wood blocks you will need to properly secure and install your beams (blocks should be installed every 3-6 feet). To get the measurements of the wood blocking you will need to measure the inside width of the beam and cut the wood blocking to the inside width dimensions. (Look below at Diagram A for a visual example)
Step 3: Installing Blocking
Now that you have the wood blocking cut and ready to go, determine installation points and spacing, mark the center points along both sides of the wall. Using a chalk line connect the marks. Note: If the studs or joists do not align with the wood blocking it is recommended that you use molly bolts or toggle bolts to secure wood blocking. 2 feet from the wall attach wood blocking using your center line. Then install blocking every 3-6 feet. With a pencil or tape mark where the blocking is installed. (Look below at Diagram A for a visual example)
Step 4: Prepare the Beams
When preparing the beams, be sure to measure each installation point and mark the beams accurately before cutting to account for variances in the wall, and it is also recommended that the beams be cut a little long so they fit snugly and can be adjusted after dry fitting. Use a saw to make clean and straight cuts, always prioritizing safety by wearing gloves and goggles. Common mistakes to avoid include incorrect measurements that can lead to wasted materials and ensuring cuts are straight to avoid gaps during installation. After cutting the beam dry fit each beam without adhesive and adjust the beam length if needed.
Step 5: Attaching the Beams
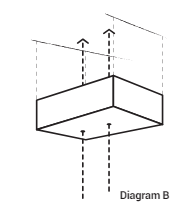
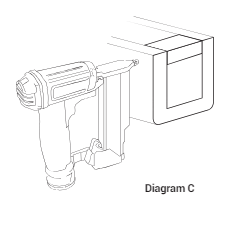
After dry fitting and length adjustment apply construction adhesive to the outside of the blocking and tops of the beam. Press firmly in place. Use finishing nails or screws to fasten the beam to the blocking. (Diagram C) Screws will need to be countersunk, covered with wood filler, and painted for a finished look.
Step 6: Finishing Touches
Clean off excess adhesive and if needed, apply caulk where the beam and wall meet. This will provide a seamless look between the ceiling and the beams.
Step 7: Maintain & Enjoy
To make sure your beams will look new be sure to follow proper maintenance by:
- Cleaning them regularly to remove dust and dirt
- Performing minor repairs and touch-ups as needed
Then admire the transformation of your space and enjoy the results. Take pride in your DIY accomplishment or professional choice and share your experience to inspire others to try faux wood beams. Reflect on the costs and time invested in the project, assess the value added to your home, and consider the long-term benefits and aesthetic appeal.
Conclusion
By following these 7 easy steps, you can install faux wood beams like a pro and elevate the look of any ceiling. Whether you’re a DIY enthusiast or prefer professional help, this guide ensures a successful and rewarding project. Transform your home and enjoy the timeless beauty of faux wood beams!
Find Custom, Affordable and In-Stock faux wood beams at ArchitecturalDepot.com
Ekena Millwork – Installation Video by Jenna Sue
Ekena Millwork – DIY Faux Wood Beams Installation by Jenna Sue