Installing a solar attic fan can be daunting. I remember the first time I tried installing one, I almost had to hire someone to help me. However, after installing multiple units, I have found the easiest way to install solar attic fans.
Materials Needed:
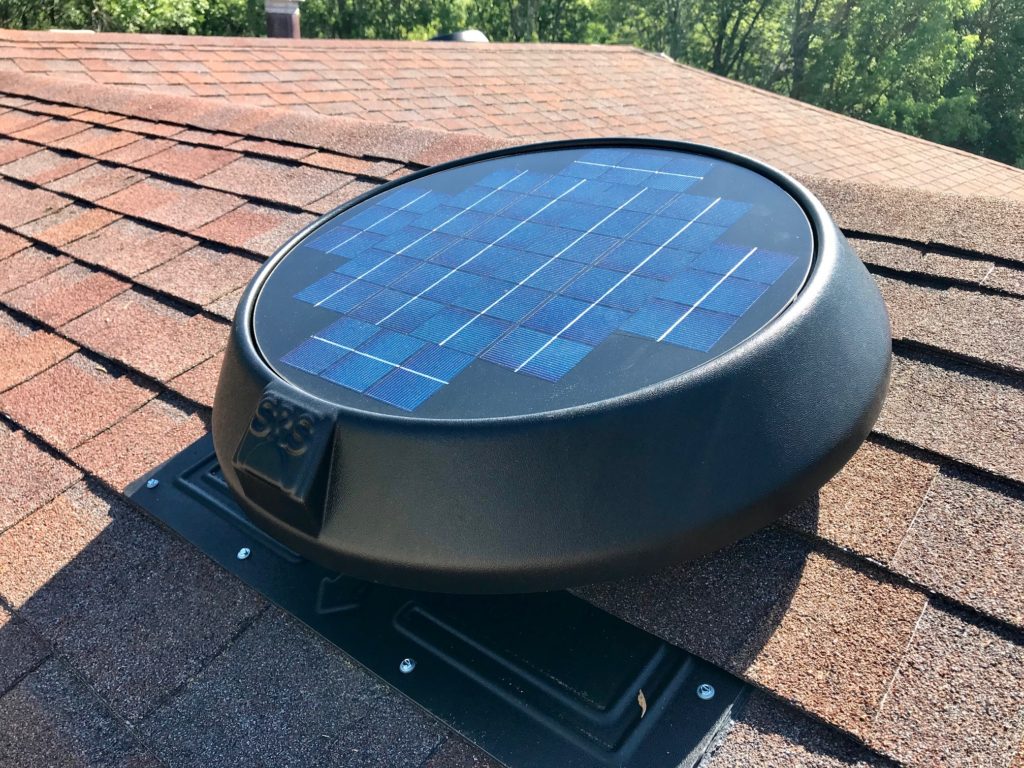
- Solar attic fan unit (Recommended: Flat Base Solar Fans: For Shingle Installation)
- Nail (for marking)
- Chalk or marker
- Measuring tape
- Saw or utility knife (Recommend an electric saw)
- Sealant
- Exterior grade screws
- Screwdriver or drill
- Partner (optional, for assistance in attic)
- Optional: Cardboard cutout with a 14 1/2” diameter and a nail hole in the middle
Step-by-Step Installation:
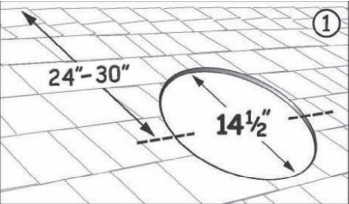
- Locate Installation Point:
- Go into your attic and find a spot 24”-30” from the roof peak.
- Use a nail to mark this point. Ensure there are no rafters within 2 feet of the marked location.
- Prepare for Cutting:
- Head to the roof.
- Measure a 14 ½” diameter circle around the nail point where the solar attic fan will be installed.
- To make cutting easier and more accurate, use the pre-built 14 ½” cutout (wood or cardboard). Place this cutout on the nail and use chalk to mark the exact area where you will cut.
- Cutting the Opening:
- Use a saw or utility knife to carefully cut out the marked circle on the roof.
- Ensure you do not cut over any rafters, as this could damage the structure of your home or limit the ventilation provided by the solar fan.
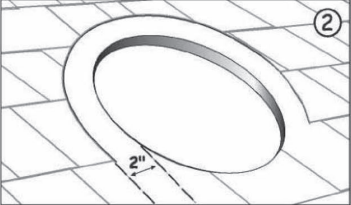
- Prepare for Flashing:
- Trim away the top rows of shingles and an additional 2” around the perimeter of the cutout. This allows space for the base flashing.
- Install the Base Flashing:
- Before installation, pre-drill four mounting holes along the bottom edge of the base flashing and one hole on each side approximately 2” up from the bottom edge.
- Slide the flat base of the solar attic fan under the top rows of shingles.
- Center the unit over the opening with the logo on the bottom.
- If your unit has a thermostat, ensure it dangles into the attic space.
- Apply Sealant:
- Lift the unit slightly and apply sealant under the lower edges and sides of the base flashing (4).
- This helps create a watertight seal.
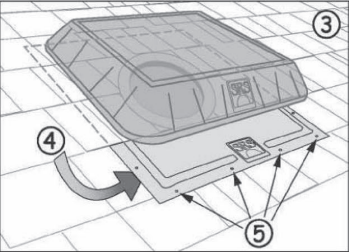
(5) Represents predrilled holes on the bottom edge and sides of the units.
- Secure the Solar Attic Fan:
- Use exterior grade screws to secure the unit to the roof deck.
- Be careful not to overtighten the screws, as this could damage the roof or the unit.
- Final Sealant Application:
- Apply sealant to the screw heads, exposed edges of the roof, and any loose shingles around the installation area.
- This ensures everything is properly sealed against weather elements.
- Testing and Finishing Up:
- Once the solar attic fan is securely installed and sealed, test it to ensure it operates correctly.
- Make any necessary adjustments or additional sealing if required.
- Clean Up:
- Remove any debris from the installation area and attic.
- Dispose of excess materials and your installed Solar Attic Fan.
Additional Tips:
- Be safe! Use proper safety equipment when cutting and handling the unit, as sizes and weights can vary.
- If you’re uncomfortable working on the roof or in the attic, consider hiring a professional. Prices generally range from $300 to $1000.
- Follow the manufacturer’s instructions for your specific solar attic fan model, as installation steps may vary slightly.
By following these steps carefully, so that you can successfully install a solar attic fan and feel confident in your hard work!
For More Types of Solar Attic Fans Click Here!